Total Pageviews

Thursday, March 29, 2012

Are you a plant killer, or are your bushes just bored with you?

Spring is the best time to plant various bushes and even some trees.  So one thing to find out now is whether the bushes you planted last year are dead and need to be replaced or if they are simply wintering.  If they're dead, you want to get them replanted as early as you can in the season so they have as much time as possible to grow and catch up with your other plants.  So how can you tell?

These are the same plant!  One is clearly not "wintering" but rather "dying."
You can see in my favorite little bush, pieris japonica, that one is clearly not "wintering" because it's companion is green and flowering.  But it still has green leaves, so I may give it another season to try and come back to life, even though judging by the base being brown it's almost all dead.  So if you don't have a companion plant to compare it to what do you do?  Look at the stems-is there green near the base of the plant?  If so, your bush is wintering and healthy.  If not, go near the base of the plant and scrape a little bit of the stem away.  Is it hollow, brown, and crackly or is there some green or hardy white there? 

And of course, each plant is different so knowing what you have is important.  I often try to keep the label of the plant on it season to season for that very reason since I'm not an expert.  Most of us know that if your evergreen bush starts looking like it's "wintering" it's dead.  Evergreens don't winter, they're hardy cold weather bushes. 
Evergreen bush in winter

Hydrangea a few weeks before spring see the hints of green?
Early spring, some green buds...
Hydrangeas on the other hand look COMPLETELY dead, which led to my research on the issue.  I spent $25 each on those four suckers, how are they dead?!?  My hydrangeas are only one season in so they are very susceptible to not surviving the winter.  But I was hopeful so I went and looked at my neighbors' hydrangeas to see what they looked like in the winter and lo and behold, while larger, they still looked just as grotesque and dead.  Yay!  Mine must be wintering!  So I left them alone and now those same dead looking stems are sprouting leaves and starting to turn green. 

And a few weeks into early spring, many leaves!
What fell out of the planter...totally dead right?
 I also had no idea that lilies are perennials and come back until my planters started sprouting all over the place.  Last season the old lilies turned into hollow sticks and broke off, so I thought I just had two planters of dirt, what a nice surprise!  Well, at least, assuming the thing that is sprouting is a lily, if not, I'll be sure to let y'all know I'm an idiot.  So apparently some plants even if the stem is totally dead are still just "wintering."  I'm assuming bulb flowers like daffodils are like this.  So really, this entire post is totally not helpful.  What am I?  Your Google?  Go find out yourself if your plants winter or not!

Or are they...

But in all seriousness, if your bushes are dead and you've googled and made sure they aren't just going to rise out of the dirt each year like daffodils or lilies, get them out of the ground and get ready to replace them as early as possible for that plant.  I got my bushes in a few weeks late last year and while they appear to have survived, they didn't grow nearly as much as they could've if I'd gotten them in during the April showers. Alright, I'm off to go dream about trying strawberries for the third year in a row and see if I can get at least one berry this time!

Thursday, March 22, 2012

Darn You Twilight and True Blood for Making Mosquitos Think They're Cool!

Mosquitoes have gotten way too ego-inflated as of late.  Those little bloodsuckers have been taking over everything (much like anything bloodsucker related in the TV and film industry). As I got to kickboxing class last night my foot started really itching.  I mean reeeeeaaaaally itching.  I take my shoe off and self-consciously pretend I'm massaging away an ankle injury while in my head thinking "What is going on?!?  OMG, do I have athlete's foot, so embarrassing!" only to pull my sock down a bit and see, nope, I've got a mosquito bite.  Now, mosquito bites on your arm or your calf or somewhere normal are annoying enough.  But the extra annoyance of a mosquito bite on the foot should be saved for at least June.  Alas, it's March here in Maryland and the unseasonably warm weather apparently brought with it natures most hated blood sucking fiends.  And this is when I remembered the lovely xmas wish list item my sister got for me...MY BAT HOUSE!!!

My bat house!  Sideways.
Yes, along with my wacky gardening ideas, I have ventured into wacky pest control.  One bat can eat about 1,000 mosquitoes in an HOUR and their homes are a natural repellent for insects, so some genius realized you can post bat friendly roosts in your yard to attract a bat family and be bug free all summer long!  You can buy a "how to build" book online, but most people I know just go ahead and buy the pre-made bat house.  They are under $100 and come in wood finishes, but if you live somewhere that experiences winter you should paint it a darker color like brown or black so it heats up more.  The ideal temperature is apparently 80-100 degrees so they recommend you place the box on a pole or attached to a building facing south at least 15 feet off the ground that gets full sun exposure.  Trees are not recommended because they are usually shaded but can also put the bats at risk of being eaten by raccoons or cats.  Also, despite the bad rumors regarding rabies, you are no more likely to get rabies from a bat than any other animal. Rabies virus in a bat can actually lead to the bat being paralyzed rather than exhibiting violent erratic behavior as other animals do.  The only downside of this is that it's important not to approach or handle a bat that is on the ground or appears dead without protection as it may actually be suffering from rabies.  But again, they are not rabies incubators any more than your dog is. 

Also, super extreme bonus that I had no knowledge of before today, bats also act as pollinators!!  Great for your summer garden!  They also keep pest bug populations down.  Also, bat poop (I know, I have a true affinity for poop talk), also known as guano, is a great fertilizer.  I have no intention of collecting guano from my bat house, but maybe one of you thinks it's the bees knees.  Speaking of guano, there will be a lot of it under your bat house because it has an open bottom so the guano doesn't build up.  You can put a collection plate under it if you're putting it near a window, door, or off a deck to collect the dookie.  They don't recommend a bucket or anything similar because if a baby bat falls out of the bat house it might get stuck in the sludge and not able to fly out.  Which would probably piss the bat mommies off and lead them to find a better landlord.
Don't be scared of bats-they don't bite and look how cuuuuuuute!   [okay disclaimer, these are fruit bats over in Australia, but it's really hard to come across baby bat photos!]  Photo Courtesy Of:  http://www.digitalspy.com/odd/news/a298039/bat-clinic-cares-for-abandoned-pups.html

And how can you be the best bat landlord?  Bats leave each winter (don't worry, they'll come back) so in addition to monthly inspections for problems, in the winter you should bring your vacant bat house down and check it for wasp nests, clean it up a bit, and make sure all the seals are still intact so it retains its heat.  There should also be a water source near by like a lake or stream within 1/2 to 1 mile from your house.  Mommy bats don't like to travel far.  Before I remembered there was a pond very close to my house hidden in some woods, I was thinking a great way to create water would be a little landscaping pond I've been fantasizing about putting in.  But alas, with the pond that excuse for overspending is gone.  Maybe next year...

Monday, March 19, 2012

I hope you have a good nail file...

...because you're hands are about to get dirty.  Ya know, one of those nail files with the pointy end that you use to clean out under your fingernails?  Okay, so I couldn't think of a witty title for "Seedlings-A How To."  But back on topic--I don't know about where you live, but here on the east coast it has been unseasonably warm and according to the experts it's going to stay that way.  This means, even though its early, we may not see another frost this season.  The average last frost date for the Mid-Atlantic is usually the last week of April.  Why am I wowing you with frost dates when I'm supposed to be getting back on topic after my how to in fingernail grooming?  Because your last frost date (LFD) is how you choose when to start your seedlings!

My seedlings.
Seedlings are plants you start indoors from seeds, harden off (more on that later), and then plant outside at the proper time.  This gives them a much better chance of surviving the harsh outdoors than simply sowing the seeds directly in the ground for less sturdy and slower growing veggies that need a longer summer season than your growing zone has.  Some seeds should be started indoors as early as 6-8 weeks before the LFD. You can find out your LFD from numerous websites, but I use Sprout Robot and Smart Gardener (see links) .  These have the added benefit of telling you which seeds to start when so you don't have to tackle creating a to do list by staring at the backs of all your seed packets and taking notes for hours.  The first seeds you generally start are peppers and tomatoes because they are slow growers and certain types of herbs.  I currently have only started my hot and sweet peppers and lavender.

Most of my other early starter plants I'll buy as transplants from the store.  Some plants are just much harder to start from seeds, which is why so many stores have them as transplants.  If you're starting your first veggie garden this year, I'd recommend getting peppers, tomatoes, eggplant...and essentially anything other than lettuce and spinach as a transplant from the store.  One less variable in your garden and much easier to have a successful crop with the seedlings already grown and hardened off.  This also helps with taking the science out of picking the variety of each plant that will work well in your area.  Your local store will have a selection that is already picked for what will work in your area, how convenient!  Now, what NOT to plant indoors first.  In addition to the plants that are harder to start indoors like tomatoes, many things are such fast growers that you don't need to start them early and can simply sow them directly outdoors when the time is right.  For me, this includes all squash, winter and summer (some people do start summer squash indoors but they always grow far too fast for me), potatoes, lettuce, spinach, peas, beans, and carrots.

Waterlogged basil-see it rot!
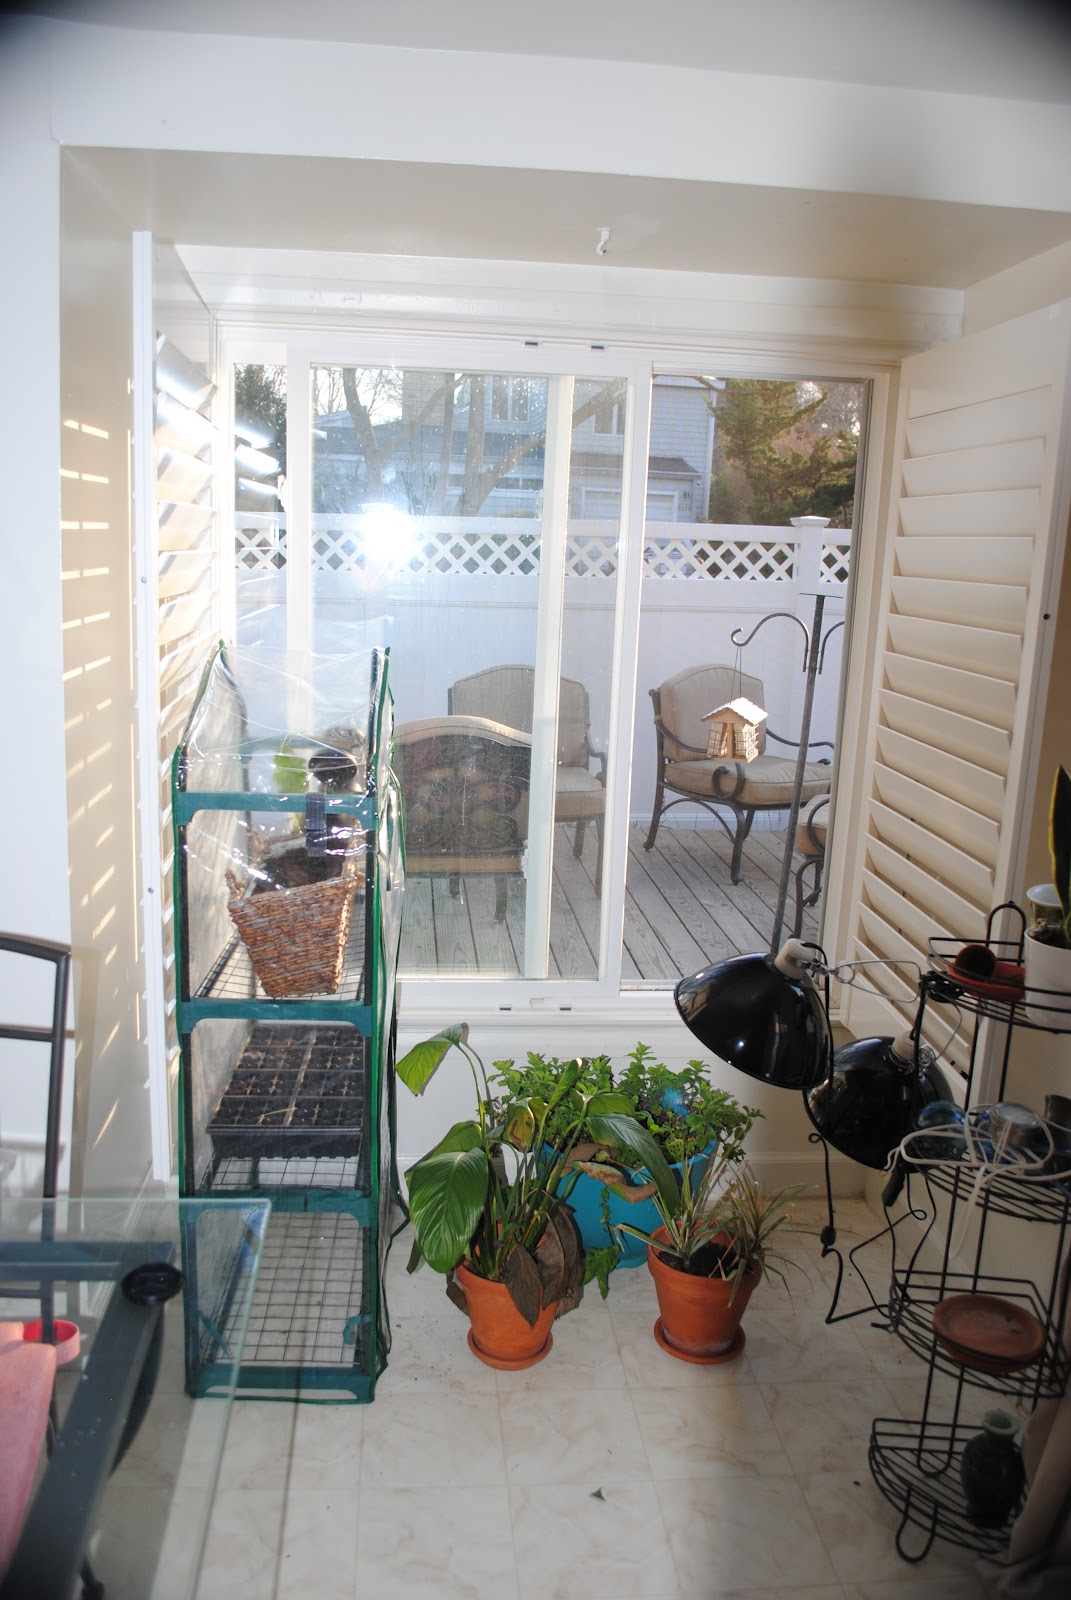
Top clear tray, seed tray, water tray
Planting Trays.  I always do my seeds in one of the giant seed starting trays.  It has holes in the bottom of each seed container, and another tray under that to catch the extra water.  Each time you water your seedlings, if the extra water isn't soaked back up by the plants after one day, discard it.  I usually pour it into one of my potted plants.  This is important because you want your seedlings moist, not wet or sitting in water.  Wet or waterlogged seedlings can lead to root rot or gross mold in the dirt.  These trays also come with a clear top, which keeps the seed pods from drying out and keeps them warm from the sun's rays.  You want to place the finished tray near a window that gets a lot of sunlight so the rays can warm up those seeds.


Pods or Dirt?  As for the planting, I use these wonderful little pods that expand when you water them but also contain a netting to hold themselves together.  Using potting dirt is very messy when you go to transplant but with the netting pods you just scoop it out instead of having to dig the roots out of the dirt.  There are also plain dirt pods that expand to the proper amount of dirt when watered but without the less-mess netting.  I'm also very tempted in the future to use a pot maker where you make little pots out of newspaper, but alas, I'm saving that expense for another year.  Another cool idea I have yet to try is a paper egg carton as a seed starter pot.  Whichever way you choose, once you have your dirt in a pot, then place 2 seeds in each pod.  Some seeds won't sprout and this gives you a better shot at having 1 plant for each seed pod.  If both sprout, simply pluck the weakling of the two out once the plants are larger. Keep the pods moist and re-water as they dry out.  With the clear top on this shouldn't be too often.  As they get bigger, transplant them to larger pots if it's not time to plant them outdoors yet with potting soil or some soil mixed with compost from your garden.  Potting soil is best because it retains water differently than garden soil and already has fertilizer in it.


Tip No. 1-Handy tip for those plants that need to be transferred to larger pots before going outside, keep the transplant pots from your store bought seedlings!  They may just look like cheap crappy plastic throwaways, but boy will they come in handy next year when you need to transplant your seedlings to larger pots.  Having these on hand will save you from spending $3-5 each for small ceramic or plastic pots.  If only I had been on Pinterest last year to see all its wonderful suggestions on turning garbage into a useful item, dern.  I've also seen folks origami-style creating larger transplant pots from newspaper, but this sure gets to be messy if the plants are still indoors when you water and you don't have extra water catching trays and I imagine even then the bottom will get soggy and fall through.


Tip No. 2-Also, be sure to label your seedlings with a garden pen and some labels.  Unless you're an expert, you're not going to know what's what by the time you need to transplant them outdoors and different plants need different trellising, room, sun, companion plants, etc.  Throwing unknown seedlings in dirt in a random assortment rather than a carefully planned bed is not your best bet (I say from experience).  You'd be amazed at how many plants are bad for other veggies!  Garden pen is important because sharpies simply can't take the water/sun combo and will wear off as the season wears on, yet another fun mistake I've made that led to my planned garden turning to the random assortment method.

So get out there in this lovely weather and get some seeds growing!  It's so hot in the Mid-Atlantic for this time of year that you can probably even get away with putting your seedling pots outside during the daytime.  And then be sure you have that nail file/toothbrush for your fingernails handy.  Or an appointment at the nail salon afterward where they can wonder if you ever bathe.  Ya filthy animal.

Wednesday, March 14, 2012

My Helpful Links

As everyone will see on the right hand side of my blog there is a list of helpful links.  Since the link text doesn't really do them justice, I figured I'd provide a summary of them below because they have been invaluable in helping me get my gardens off the ground.  Hopefully they can help you tackle your first garden or take your gardening to the next level.  Now is the time to plan your garden and start planting "early spring" varieties that can take a frost or two like peas.  And if anyone has any other sites they love please share. 

1. Sprout Robot.   Very simple site.  You just enter your zip code and it tells you when to plant what.

2. Baker Creek Heirloom Seeds.  Confession, I haven't actually used them.  But I know how important heirloom seeds are to some people so I wanted to include it.  My sister uses them and they have a HUGE variety of seeds far cheaper than Burpee (so I was a bit jealous when I saw her receipt) and she's trying a bunch of fun things from them like stevia and coffee.  Yes, you read that right, COFFEE.  Clearly risk-taking gardening runs in the family.  I'm sure I'll be doing a post on her beautiful garden in central Delaware at some point so you can see how her seedlings did, and I'll be getting some of her seedlings to transplant too.  Seed sharing, it's all the rage.

3.  "Free Garden Planning Tool" a/k/a SmartGardener.com.  This is a free garden planning site.  It has some quirks but overall I love it.  You create a little map of your garden, tell SmartGardener your zip so it knows your planting season, and add the plants you want to put in your garden; they have hundreds of varieties.  It then gives you a planting plan with how much you should do of each plant based on the number of mouths you have.  It also takes into account companion plants that go well together and which direction your garden faces.  They even have little container plots you can add to your map.  If you aren't sure what you want, it can suggest plants for you based on a number of factors (easy, drought resistant, shade happy, etc) and then you can order the seeds directly through the site.  The best part of the site for my purposes though...it gives you a weekly to do list based on the plants you have in your garden.  Everything from when to prep the soil to when to start a fall crop.

4.  Gardeners.com.  Although I've never ordered plants from Gardeners, this is my go to site for all sorts of fun garden tools.  Literally any random garden thing you've heard of, they have.  My favorite buys from here are my grow bags, a garden pen for labeling that doesn't fade outdoors like sharpie, a firewood rack, and a variety of hard to find trellises.  The prices are very reasonable and they often have good sales.  They've also got plenty of raised bed kits.  Currently on my wish list from here is a water timer and watering kit.  Or like three.

5. Burpee Seeds.  Not much to explain here.  America's seed company, they have just about every seed you're looking for and seedlings for many harder to grow varieties as well that they ship once it's time to plant in your zone.  Most of my seeds this season are Burpee and most seeds you'll find in stores will also be Burpee. I'm also trying sweet potatoes and onions from them.

6.  Baltimore Sun-Garden Variety.  Sadly, this lovely blog on gardening ended last year.  But they keep the archives up online and there's an insane amount of entries on vegetable gardening in the Mid-Atlantic.  You can filter based on various gardening topics too.  Really fun to go and browse on your lunch break or to search if you're having a specific problem with a plant.

So those are my go-to sites.  I'm sure I'll add more as I continue experimenting and go off researching for more help :o)

Tuesday, March 13, 2012

Who Doesn't Love Worm Poop?

One of the first steps for good home gardening (or so I'm told)...COMPOST!  If you're thinking about setting up a garden composting is easy and fun to do and will save you loads of money while helping keep your plants healthy and happy.  And (sad for my social life as this may be) I've spent hours and hours researching various composting methods.  Following my OCD nature, I currently have three separate composting methods going.  Yes.  Three.  Compost is essentially used to mix in with your dirt or potting soil as a great fertilizer.  You should amend all garden soil with a good dose of compost before planting.  So here's my summary and pictures for you so you can decide which composting method you might want to try.

1.  Kitchen Composting.  This has to be the easiest method of composting.  It involves buying a little composting pale that comes with a filter to shove in the top, and some biodegradable compost bags.  Whenever you're chopping vegetables you just plop it right next to the cutting board and toss the discards into the countertop composter.  Coffee grinds and tea bags can also be thrown in here, but as with all composting methods NO MEATS or fats, which takes out most dinner leftovers.  Just stick to veggies and fruits.  The downside of this method is, the items you throw in there won't fully compost so you'll need a spot in your yard to let the food continue to rot and do its thing before you get actual compost.  I've had it for at least a year, and with the exception of one time I didn't change the bag and just stopped using it once it got full for a month or two, I've never had a problem with it smelling.  I do occasionally get little fruit flies, at which point I rinse off the filter top to get rid of any eggs and change the bag out.  Voila, no more flies.

2.  Yard Compost Bin.  I inherited a SoilSaver compost bin from an elderly neighbor who was nice enough to notice my attempt at veggie gardening when he went to throw his bins away.  So I got it free instead of spending $100+, which made it possible. 

You can see from the top shot that the leaves and grass cuttings I put in at the end of last season still haven't composted so I don't think there's a true benefit to having an enclosed manufactured bin as opposed to a lovely mesh one you can self mix throughout the season.  Each time I mow my lawn or rake, all the clippings go in the yard bin.  The kitchen bags also got tossed in this bad boy.  At the bottom you can see the lovely compost it created for me that I'll be throwing in all my garden projects.  Again, no meats or fats in the bin, but all soft yard waste (no sticks, they won't decompose in time) and kitchen produce scraps are fine for the outdoor bin.  I've never had a smell from it, nor bugs or animal problems.  If you notice a smell from any compost bin, reduce or eliminate fruits.  I don't know why, but experts all seem to agree they can throw the balance off and lead to some stank.

3.  WORM BIN!  This.  Is.  Awesome.  Due to the sometimes extreme blizzards and heat in the summer I decided to get the Worm Factory, which can be used indoors.  I love this sucker.  You stick it in your kitchen, get it set up with some "starter" material for the worms to eat and order some red wigglers from Uncle Jim's worm farm.  They ship them out a bit dehydrated to protect them and then one watering of the worm factory later they're plump and happy again.  So your worm bin is up and running and you drop the same things you would in your kitchen countertop composter in there.

tumbleweed blanket to keep moisture

Be more careful with fruits as this is a giant composter that is usually in your kitchen and you really don't want to experiment with lots of fruit early on and get stinky.  I haven't had problems so far.  The key is to put small scraps in, sprinkle them with some dirt on top to entice the worms to eat, and once a week flush a bucketful of water through the system (it comes out the bottom as worm juice).  The worm juice is a perfect light fertilizer water for plants so I've been using it on everything.  I've noticed the worms need a bit of time to get up and reproducing so they can eat everything you can offer them.  You order 1,000 minimum to start and eventually they'll populate the whole bin to about 12,000 worms but to start they can't eat much.  I actually just ordered 2,000 more to give my worms a breeding kickstart so I can really get composting before I need to do all my soil prep for the season.  As with everything, no rotting food smell noticed at all.  It smells kind of rainforesty (like moist clean dirt) when you open the lid, but it's actually a pleasant smell.


The mechanics.  Once your wormies fill one bin with lots of worm composty goodness, you put the other bin on top and start filling it with worm food.  The worms sense food and leave the bottom bin of compost to go eat in the top bin.  This leaves you free to remove and steal the lovely worm poop from the bottom bin once they've migrated, and leaves you with an empty bin for the next round.  If I had to pick one method, this would definitely be it.  It's fun, about as pricey as an outdoor pre-fab compost bin, and much more convenient than walking out to the bin every time you have kitchen scraps.  I'm also betting it will work faster than the outdoor compost bin.  Downside is I doubt I could fit a yard full of lawnmower scraps in here so I'll be continuing with my outdoor bin too for those.

He's so seeeeeexy.  All the ladies love him.
Alright, so hopefully that has everyone wanting to run out and save the planet by composting all their kitchen scraps!  If not, you clearly missed the discussion about fun wormies.  They're awesome.  Also, they have total sex appeal, I mean, COME ON, they reproduce in a few months from 1,000 to 12,000!?!  So much sex in your kitchen!  Or splitting in half or something.  I really know nothing of worm reproduction.  I'm sure if I ever get a reader in the sixth grade they'll be happy to fill us in.

Monday, March 12, 2012

Buckle Up Rupert, Cuz I've Gone Pro


Raised bed in backyard-North facing
That's right, I've decided it's time to take my gardening to the next level.  Obsessive blogging about it!  I've spent three summers now in my new home attempting to garden.  I don't want to "attempt" anymore.  I want to garden and be proud of the amazing garden and bountiful harvest I bring in.  So I decided to start this blog to organize my thoughts and keep detailed notes of everything I do.  Every variety I try, every weird planting idea I have, every misstep in watering, and how my plants end up doing despite all my wacky notions!  

Not much now, but it's gonna be! South facing
I live in Maryland in a suburb of Baltimore and my garden has three main parts.  In my back yard I have a raised garden bed.  This parts main problem is shade, it's surrounded by trees, but I think gets at least 8 hours of full sun.  Then in front of my house (southern facing) I have a large patio where I put my container garden.  The patio is fenced in, and on the other side of the patio I tried last year (unsuccessfully) to do a wildflower garden for clipping.  You'll have to stay tuned to see the grand plans I have for it this year!

Indoor Edibles, Seedlings
So where do I stand right now?  Well, I planted my first seedlings this weekend!  I started with these lovely flat seed pods that you water until they expand with a little hole in the mesh covering that you pop seeds into.  So much less mess than just dumping potting soil into the planters.  I also got a $30 3-tier greenhouse with a plastic cover from Big Lots to start my seedlings in.  I have the hope that year round I can use it for herbs and other edibles.  The only herbs I currently have growing in my kitchen are a giant planter of mint that has done amazing since I brought it in at the end of last summer.  I also have a basil plant I got from the grocery store that came in a bag of water.  Apparently sticking it in dirt for the first time was not smart, and it probably won't make it.  But it was worth a shot!

The seedlings: in one long window planter that I'm hoping to keep indoors if possible I planted some Burpee Black Seeded Simpson lettuce, Burpee Baby Leaf Hybrid Espinaca spinach, and Burpee Gourmet Blend lettuce.  No, I'm not sponsored by Burpee (I WISH I were).  In my dirt pods I started Burpee True Lavender, Burpee Mariachi Hybrid pepper (I like a miiiildly hot pepper), and Burpee Sweet Pepper Carnival Hybrid Mix.  I'll post pics of each seed packet once I do my low down on each plant.  
Planter on Left has Peas In-A-Pot!

I also started an outdoor container pea called Burpee Peas In-A-Pot.  I've never tried peas before so I'm very excited to see how container peas will work out.